Creating A New Vendor
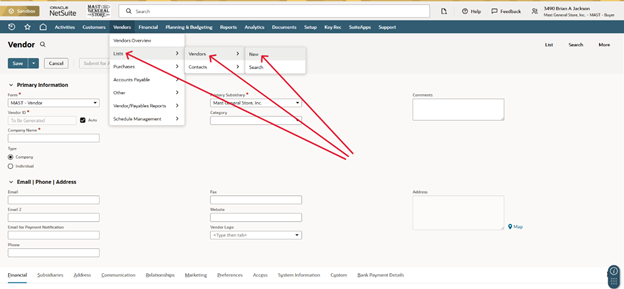
- Now you can start to fill out the vendor information
- Company Name = Vendor Name
- Ex: Vendor_Graphics
- Make sure to uncheck Auto, next to Vendor ID
- Phone
- Ex: 828-963-0120
- Company Name = Vendor Name
- Next go to the Address tab on the menu ribbon, located towards the bottom of the vendor page
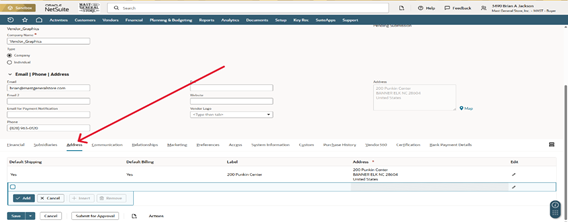
o Click on the Pencil icon, located on the far right of the address field
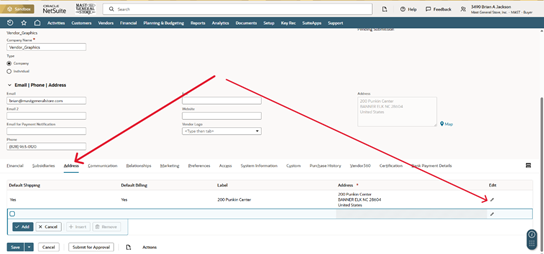
- You should be able to hit Save, located at the bottom of the screen now
- Next go to Relationships on the menu ribbon located towards the bottom of the vendor page again
- Click New Contact
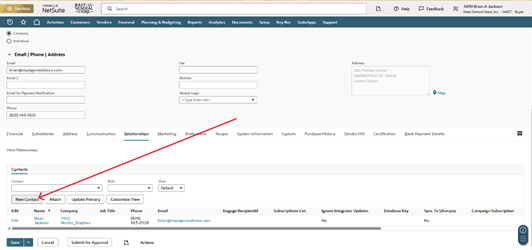
- Here you should be able to add the Rep’s name, email, and phone number.
- This will be the email that is used when writing and sending out Purchase orders
- Click Save, this will load that information into your vendor page now
- Here you should be able to add the Rep’s name, email, and phone number.
You have now created a new Vendor